Hi, All!
Well, I've finished my next video tutorial and I'm on to my the third one. Still a bit nervous and tongue-tied, but I'll get the hang of it soon and eventually sound like some of the pros out there. I do, however, have to remember to check the battery life on the camera. . .OOPS!! ;) hehehe
I enjoyed making this card. . .I loved making the grass and using the Satin Stitched ribbon-It's so soft!! I'll have to buy some more ribbons from Stampin' Up!
Here's a pic of the card I made and you can view the video HERE
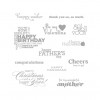
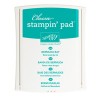
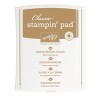
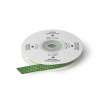
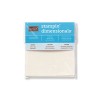
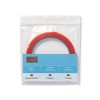
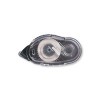
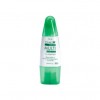
Here is a list of all the materials I used to make this card:
Hope you like it!
Enjoy!
Gloria :)
Friday, March 21, 2014
Happy Easter Eggs Card
Labels:
bling,
brown,
cards,
decorative label,
Designer Paper,
DIY,
Easter,
easter eggs,
gumball green,
ink pads,
Paper,
paper punches,
Punches,
rhinestones,
Stampin' Up!,
stamps,
supplies,
Try It,
ucanmakeittoo,
youtube
Tuesday, March 18, 2014
Ladybug Card
Hi, All!
I wanted to share with you my first REAL card tutorial video. . .YAY!
My niece called me and wanted some ideas for her daughter's first birthday. . .her theme is Ladybugs. I came up with this invite for her and decided to make a Birthday Card Tutorial.
You can see the video here
Here's a list of materials, and links, used for this Ladybug Birthday Card:
Thanks for stopping by!
Enjoy!
Gloria :)
I wanted to share with you my first REAL card tutorial video. . .YAY!
My niece called me and wanted some ideas for her daughter's first birthday. . .her theme is Ladybugs. I came up with this invite for her and decided to make a Birthday Card Tutorial.
You can see the video here
Here's a list of materials, and links, used for this Ladybug Birthday Card:
Enjoy!
Gloria :)
Sunday, March 2, 2014
Box-Making Shim
Have you ever made a box, but your top lid is just a bit tight, which then causes your bottom box to buckle slightly on the sides? GRRR. . .
One Christmas, sorta-kinda, tradition I have is making boxes out of the cards we have received. I have issues with throwing out things. I think it's called hoarding, but. . .that's a whole new blog session. Anyway, as I said, I make the cards into boxes. I tear the fronts and backs apart, and then score them 1" on each side. Mind you, I've been doing this since about 1985, so I used to use a ruler and any blunt item I could reach for. I don't even know if a 'scoring' plate was even thought of back then. So, after I scored them and folded them, I'd put them together. Couldn't figure out why they buckled, but at the time I really didn't care. It's not like there was youtube or blogs where someone would see it and 'comment' on my mistake. ;)
After several years, it did start to bother me and I figured out what the problem was. DUH, the top lid needed to be a bit larger. I tried to score just shy of 1". . .BRILLIANT!! Unfortunately, only some of them were perfect fits and some were too big.
Now I have my Simply Scored and it has 1/8" increments. YAY. . . NOT! I still have issues with the box lids. UNTIL. . .(imagine angels harmoniously singing here). . .I came across Connie Stewart's youtube video about her Box Shim. OMG. . .I'm saved from box-making shame.
Here is one of the first boxes I made using this shim:
Yep, that's a Pepsi box. I prefer to use what I have here at home, before having to go and purchase stuff. Don't get me wrong, I have no problems 'going shopping' (ask my husband), I would just rather it be worthwhile shopping. . .you know, like for shoes!!. Well, as you can see, that lid fits perfect!! To quote a very famous blonde: "Not too big, not too small. . .it's just right!"
I made this box for my friend's valentine. She loves CHOCOLATE, so I made her a bouquet roses made with Hershey's Kisses and a FRIENDSHIP Valentine mini album.
This is the not completed step. Still had to add the leaves and the tissue paper and cover the box with some paper. My latest love is the Sweet Sorbet Designer Paper in the Sale-A-Bration catalog (Stampin' Up!) It, along with some other great items, is FREE with every $50 purchased. It's gorgeous paper!!
Back to the shim. Connie's shim works, because it adds just a hint of space to the edge of the Simply Scored, which is a win-win for all box-makers. Here's a pic of mine. I love it. I've been going crazy making boxes lately. Who knew a simple little tool would make me so happy? Probably Connie. . .LOL It's great, it's handy, it's perfect! Did I mention I love it?!! Thanks, Connie!!
You can see her video with just one click: Connie Stewart Shim
I hope this helps you with your box creations!! Thanks for stopping by!!
Enjoy!
Gloria :)
Friday, February 28, 2014
A Little Behind. . .
Oh my gosh. . .I am so behind on here. I uploaded 2 videos to youtube. The first one is a picture show of my very first Paper Pumpkin Kit and the cards I made. You can see it here: My Paper Pumpkin
The best part of this kit was my FREE Markers Set! FREE is always good. If you're interested in learning more about Paper Pumpkin, you can go to www.mypaperpumpkin.com. Hurry, the FREE Markers Set deal ends March 31st (11:59 MST). If you're still unsure, try the Paper Pumpkin Try It Kit - however, this DOES NOT include the FREE Markers Set.
I am so excited for the March Paper Pumpkin kit to arrive. . .it's like having my birthday every month. I receive a package and it's always a surprise!!
My second video was a quick Look-See of a Card Deck Mini Album. Check it out here: Card Deck Mini Album I had intended on making the REAL video tutorial on that, but soon found out there's more to "wanting to do a video tutorial" than I thought. . . LOL
GOOD NEWS, though!! I recently acquired certain items needed for this process, so. . .YAY. . . I will be making videos VERY SOON. Now I have to gather all the supplies and materials for the albums and cards I want to share with everyone. I will announce that here.
Please come back to check on any updates.
If you need any Stampin' Up! supplies, stamps, papers, punches, etc.--stop by store:
www.ucanmakeittoo.stampinup.net
Two ways to get our catalogs:
Online PDF: You can download the catalog directly to your computer or view it online (saves space on your hard drive)
Hard Copy: If you would like the hard copy of the catalog(s) in your hands, please let me know by email and I will send it your way. ucanmakeittoo@usfamily.net
Well, thanks for stopping by and please come back. . . I'm just getting into the groove with all of this. . . so, I promise. . .this (and me) will only get BETTER!!! :)
Enjoy!
Gloria :)
Labels:
Card Deck,
cards,
Catalogs,
DIY,
FREE,
ink pads,
kits,
Mini Albums,
Paper,
Paper Pumpkin,
Punches,
Stampin' Up!,
stamps,
supplies,
Try It,
videos,
you can make it too,
youtube
Thursday, February 13, 2014
Hi, All!
This is my Friends Defined card. I was making a card for a good friend of mine and decided to share with you. I hope you send this off to your Best Friend(s).
You can find the video at YouTube. Please subscribe to my channel. I will be improving on the quality of my videos soon. Meaning, it will be a video and not a slide show. . .LOL
I love this card because of the embossing. I used the Lacy Brocade Embossing Folder. . .I think it made a plain card really pop and added a bit of elegance!!
Supplies Used:
Lacy Brocade Embossing Folder - Clearance Rack Item
Basic Rhinestones Jewel Accents
Midnight Muse Stamp Pad
Beige Card Stock 8-1/2 X 5-1/2, score at 4-1/4, fold it down and use your bone folder for a crisp fold.
White Card Stock Card Stock: 5 X 3-3/4 and 4 X 2-1/2 (emboss these)
Light Blue Card Stoc: 5-1/4 X 4 and 4-1/4 X -3/4 and a strip at 3-3/8 X 1-1/8
Adhesives: Stampin' Dimensionals, Tombow Multipurpose Glue and SNAIL Adhesive
Other Tools: Paper Trimmer, Paper Snips and Cosmetic Wedge for the edging on the label.
I hope my supplies list and video help you in re-creating this card for your friends.
Enjoy!
Gloria :)
Wednesday, February 12, 2014
My First Video Tutorial - WOOHOO!
WOOHOO! I finally uploaded my first video tutorial. It's really a slide-show set to music, but it's my best for now. . .working on the actual 'VIDEO' thing. :)
I have been making party favors and such for years, so I just combined the stamping and favor making.
Mini Card with Side Pockets for some gum sticks.
You can find the video at YouTube. . . have a peek. Subscribe. . .I do plan on adding more videos real soon!!
Supplies Used:
Crumb Cake Paper (7-1/2 X 3-3/4 and 6-3/4 X 1)
Pattern Paper: I used the More Amore Specialty DSP* (hurry, it's in the Clearance Rack)
7 pieces: 1@ 2-7/8 X 3-/8, 4@ 1-7/8 X 3-5/8, 2@ 5/8 X 3-5/8
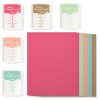
Label Love Bundle Set: Stamps & Punch (I love buying the bundles)
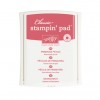
Raspberry Ripple Stamp Pad (I bought it in the 2012-2014 In Color Card Stock and Stamp Pad Kit)
Adhesives: Sticky Strip and Tombow Multipurpose Glue and/or SNAIL Adhesive
Other Tools: Paper Trimmer and Simply Scored, also.
Of course, you need gum. As long as you use a stick gum, it will work out great.
Well, I hope my video and supplies list help you in making this Mini Card Treat Pocket for family and friends, or your kids' classmates.
Enjoy!
Gloria :)
Subscribe to:
Posts (Atom)

