Have you ever made a box, but your top lid is just a bit tight, which then causes your bottom box to buckle slightly on the sides?
GRRR. . .
One Christmas, sorta-kinda, tradition I have is making boxes out of the cards we have received. I have issues with throwing out things. I think it's called hoarding, but. . .that's a whole new blog session. Anyway, as I said, I make the cards into boxes. I tear the fronts and backs apart, and then score them 1" on each side. Mind you, I've been doing this since about 1985, so I used to use a ruler and any blunt item I could reach for. I don't even know if a 'scoring' plate was even thought of back then. So, after I scored them and folded them, I'd put them together. Couldn't figure out why they buckled, but at the time I really didn't care. It's not like there was youtube or blogs where someone would see it and 'comment' on my mistake. ;)
After several years, it did start to bother me and I figured out what the problem was.
DUH, the top lid needed to be a bit larger. I tried to score just shy of 1". . .
BRILLIANT!! Unfortunately, only some of them were perfect fits and some were too big.
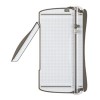
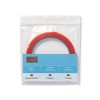
Now I have my
Simply Scored and it has 1/8" increments.
YAY. . . NOT! I still have issues with the box lids.
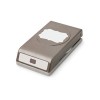
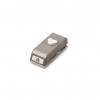
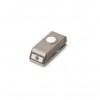
UNTIL. . .(imagine angels harmoniously singing here). . .I came across
Connie Stewart's youtube video about her Box Shim.
OMG. . .I'm saved from box-making shame.
Here is one of the first boxes I made using this shim:
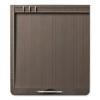
Yep, that's a Pepsi box. I prefer to use what I have here at home, before having to go and purchase stuff. Don't get me wrong, I have no problems 'going shopping' (ask my husband), I would just rather it be worthwhile shopping. . .you know, like for shoes!!. Well, as you can see, that lid fits perfect!! To quote a very famous blonde: "Not too big, not too small. . .it's just right!"
I made this box for my friend's valentine. She loves CHOCOLATE, so I made her a bouquet roses made with Hershey's Kisses and a FRIENDSHIP Valentine mini album.
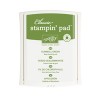
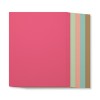
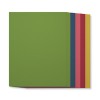
This is the not completed step. Still had to add the leaves and the tissue paper and cover the box with some paper. My latest love is the Sweet Sorbet Designer Paper in the
Sale-A-Bration catalog (
Stampin' Up!) It, along with some other great items, is
FREE with every $50 purchased. It's gorgeous paper!!
Back to the shim. Connie's shim works, because it adds just a hint of space to the edge of the Simply Scored, which is a win-win for all box-makers. Here's a pic of mine. I love it. I've been going crazy making boxes lately. Who knew a simple little tool would make me so happy? Probably Connie. . .
LOL It's great, it's handy, it's perfect! Did I mention I love it?!!
Thanks, Connie!!
You can see her video with just one click:
Connie Stewart Shim
I hope this helps you with your box creations!! Thanks for stopping by!!
Enjoy!
Gloria :)